A Cute Kitchen Gadget Leads to a Gorgeous Cherry Pie
I’ve raised my daughters to love baking, so it’s no surprise that when we came upon a cherry pitter that looked like an adorable critter … they twisted and twisted my arm until even I was excited about the thing! Of course we decided that we needed to make a cherry pie.
SEE THE RECIPE
 by
Amanda
by
Amanda
by
Amanda
I’ve raised my daughters to love baking, so it’s no surprise that when we came upon a cherry pitter that looked like an adorable critter … they twisted and twisted my arm until even I was excited about the thing! Of course we decided that we needed to make a cherry pie.
The Lattice-Topped Cherry Pie recipe called for canned tart cherries, which are easy to find, but we decided to try it with fresh tart cherries. Unfortunately, we couldn’t find any tart cherries in the produce section at the grocery store or co-op. Just as I was getting distraught, a friend told us about a wonderful tart cherry tree in her neighborhood, and we secured our cherries.
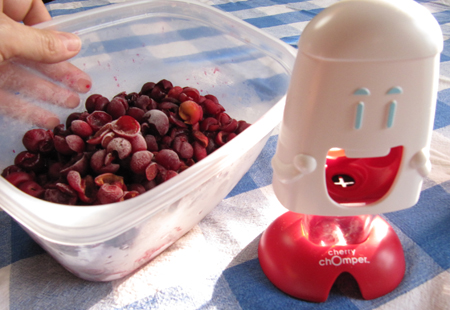
Pitting cherries is indeed messy, but our little "chomper" certainly helped manage it. And, yes, he was awfully cute. About 30 minutes of chomping and we had plenty of cherries, which we simply put into plastic containers and froze until a few weeks later when we were ready to bake a pie.
If you decide to pick your own cherries and are lucky enough to find them, then just take 3 ½ cups of cherries out of the freezer about 3 or 4 hours before you are ready to make your pie. You could also thaw them in the fridge about 8-12 hours before you plan to bake. (Here is our cute cherry pitter next to our thawing cherries …)
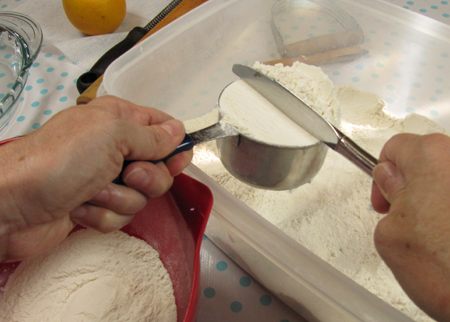
The first step in this pie recipe is making the crust. As always, measure the flour by spooning it into a measuring cup and then leveling with a knife.
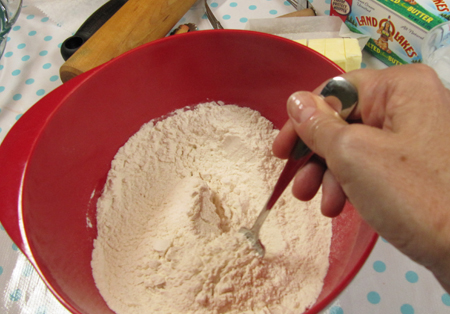
Now simply add the salt and mix these two ingredients together with a fork.
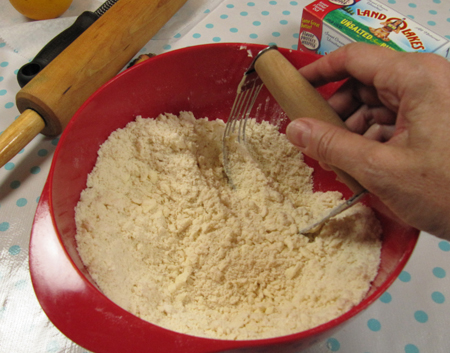
The next step is to cut in the butter. Cut it into chunks and drop it into the flour, then use a pastry cutter to blend it in. Occasionally the cutter will get full of butter; just use the dull side of a butter knife to scrape it clean and continue.
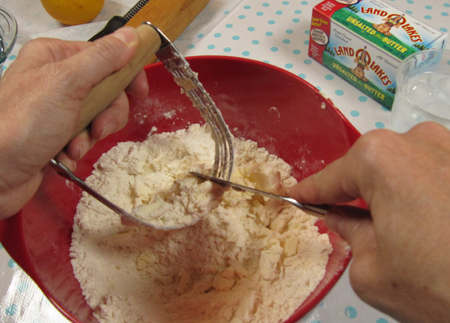
When the butter resembles coarse crumbs, you are ready to add the ice water.
Begin with 4 of the 5 tablespoons of ice water, sprinkling it around onto the flour and mixing it in with a fork.
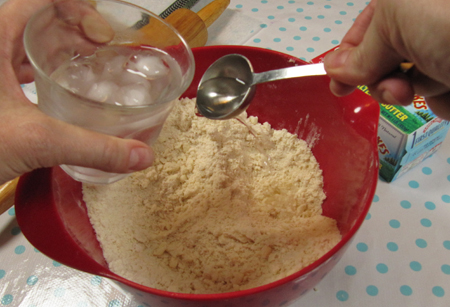
If the mixture isn’t coming together, add the last tablespoon. Add only as much water as you need; too much water will make a tough crust.

If it is starting to clump together when you stir, take a hold of the dough and press it together with your hands. If it comes together, you are ready to roll!
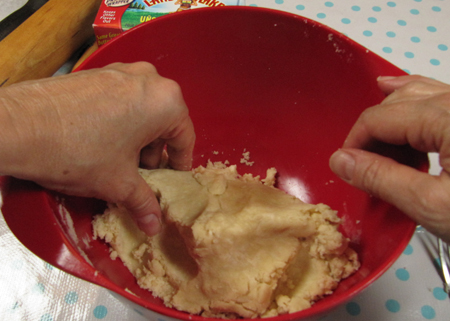
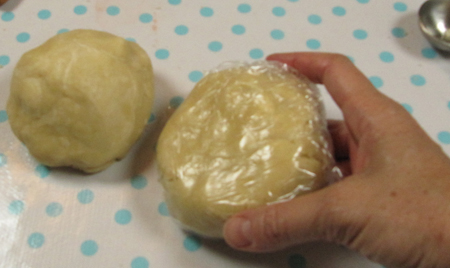
Divide the dough into two balls. Flatten one ball slightly, wrap it in plastic, and put it into the refrigerator for later.
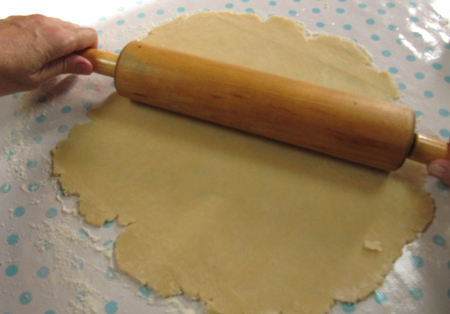
Now, roll out the bottom pie crust with the remaining dough ball. When rolling the dough, keep the surface and rolling pin lightly floured, flipping the dough often to keep it from sticking.
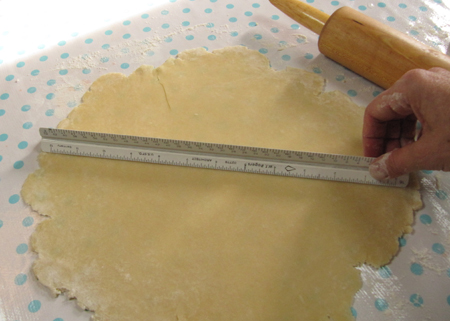
When you think the dough is 12" in diameter, check the measurement with a ruler.
To more easily move it into the pie pan, gently fold the dough in half, then in quarters. Lift it carefully into the pie pan and gently unfold the dough.
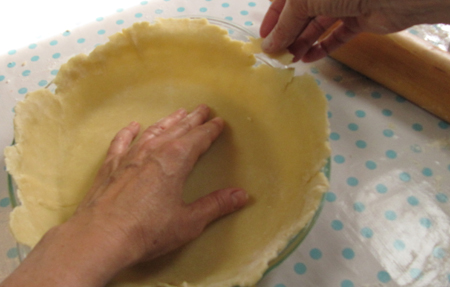
When it is fully unfolded, firmly press the crust into the pan. Pressing it into the bottom and sides of the pan keeps it in place during baking. I used to have trouble with my crusts sinking down when I baked them, and this tip really makes a difference! You can also patch any short sides or gaps by taking dough from sides with too much and just pressing it in where needed.
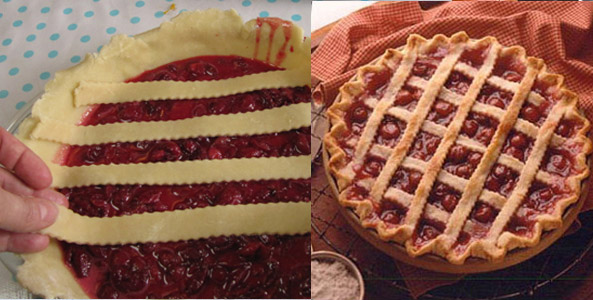
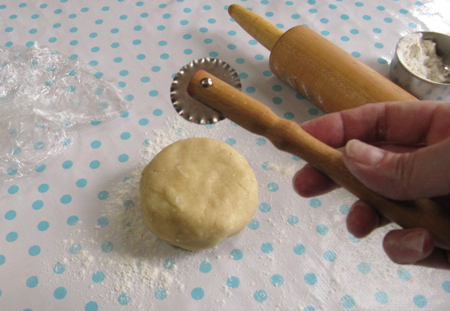
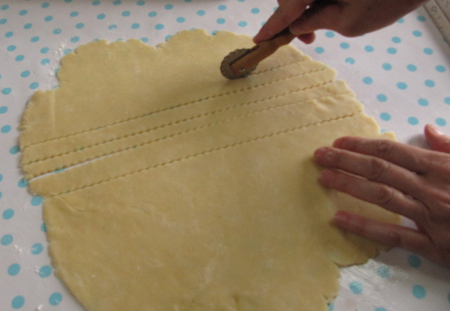
My crust didn’t have a lot of excess, so I decided to wait to trim the edges. I put my pan into the refrigerator and moved on to rolling out the second half of the dough. I used a pastry wheel to easily cut fancy edges, but you can also use a sharp knife to make straight-edged lattice strips.
When you have the dough rolled to an 11-inch circle, cut it into ½-inch strips.
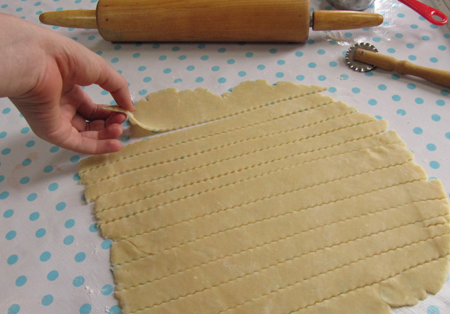
As soon as I finished cutting the dough, my youngest daughter swooped in for a taste, anxious to help me get rid of the scrap pieces on the ends!
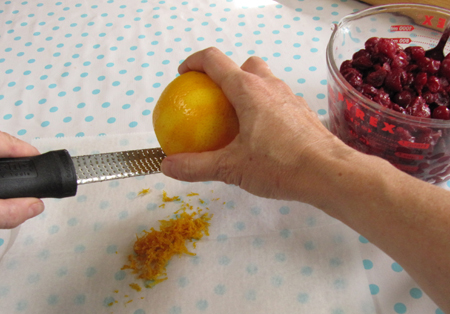
With the lattice strips ready, I made the cherry filling. Begin by zesting an orange, which easily produces 1 teaspoon zest. I use a Microplaner which I find especially good at getting only zest and none of the white of the peel.
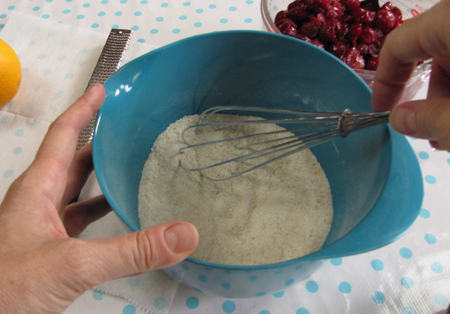
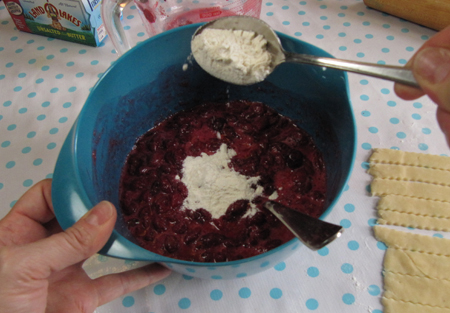
Next, combine the sugar, flour and salt in a medium bowl.
The last step is to add the orange zest and the cherries, about 3 ½ cups thawed with their juice or the 2 cans, drained.

My cherries were very juicy when thawed, so I added an extra heaping tablespoon of flour.
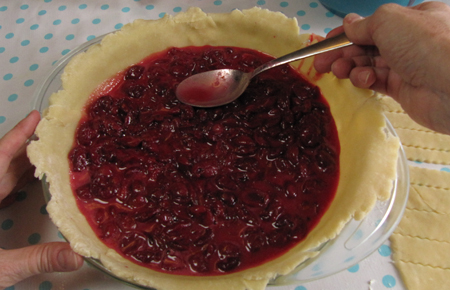
Next, pour the cherry filling mixture into the pie crust. I love the color!
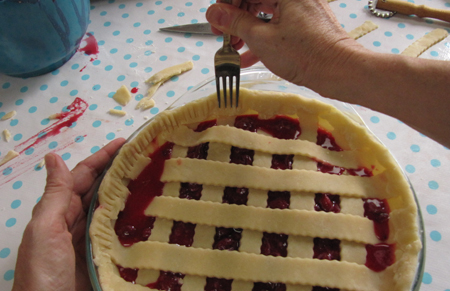
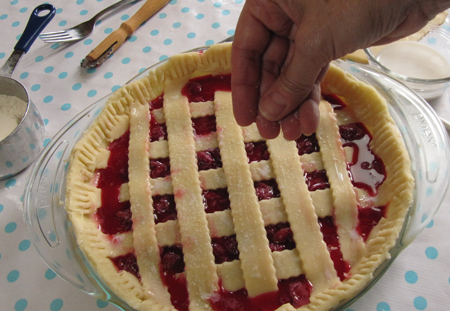
Add the lattice strips by first placing 5 strips across the filling. Trim the strips as necessary.
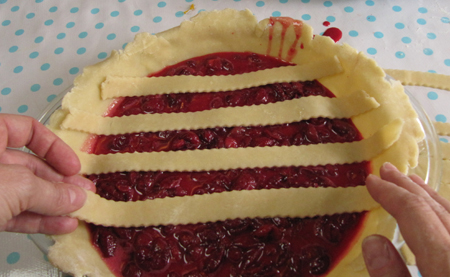
Then add 5 strips perpendicular to the first set and …
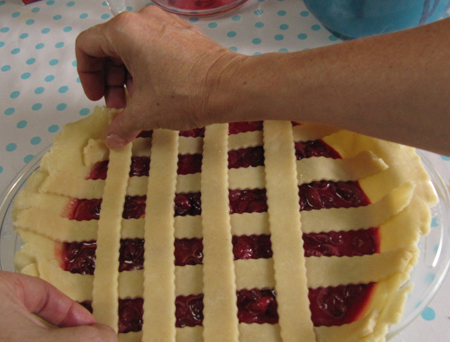
Voila! You now have a lattice top. I find this actually easier and more fun than putting on a full top crust. The cherry color is so pretty peeking through.
Fold the bottom crust edges over the lattice edges and finish the crust. I trimmed the rough edges at this point, then folded over what I had and crimped it by pressing along the edge with a fork.
Not bad! My filling was a little juicy as you can see. The next step is brushing the lattice strips with milk.
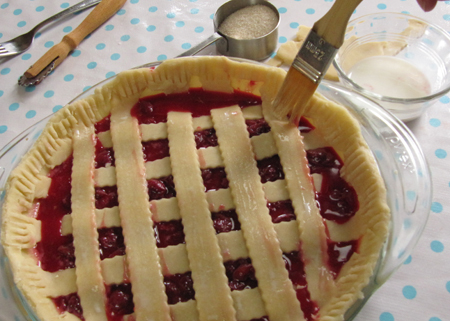
Then a sprinkling of sugar.
To keep the outer crust from over-browning, I like to use pie crust shields that are available at kitchenware stores. They simply set along the outside edge of the pie. Another solution to keep the crust from browning too much is to lay strips of aluminum foil around the edges of the pie and then crimping the foil around the crust edge.

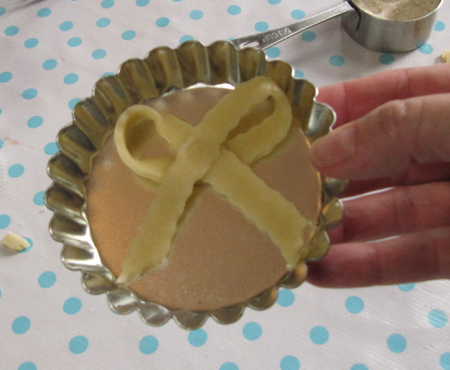
After I popped the pie into the oven, I played around with the remaining crust strips and made a nice little bow.
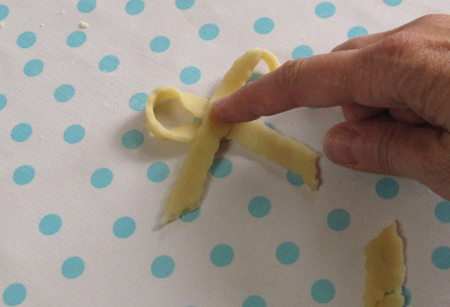
I baked my bow in the oven in a tartlet pan.
My bow was brown after about 20 minutes. My pie was brown and beautiful after 50 minutes, and I set my bow along the edge. The pie was still bubbling hot, so the bow easily "stuck" to a bit of filling and stayed in place as the pie cooled.
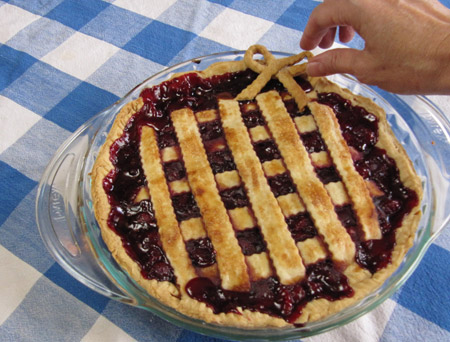
What a beauty! My family "oohed and aahed" over my bow, and I was very proud of my creative touch. Everyone loved the tartness and fruitiness of this pie, and I admitted to using only 3/4 cup sugar instead of a full cup. I thought the sweetness was perfect, but of course this varies by personal taste. It served beautifully and the crust was one of my flakiest to date.
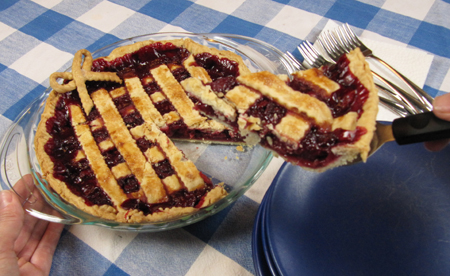
I am so grateful to my friend who helped me find these amazing cherries. I saved the piece with the bow and plan to drop it by her house tomorrow! I will definitely make this Lattice-Topped Cherry Pie again soon, and I hope you give it a try, too. Let me know how you like it, and if you have any fun ideas for the extra lattice strips!
Check back in a few days when Tami makes some cookies for the cookie jar.
Liz is paid to write for the Land O'Lakes Recipe Buzz® Blog.
Share Your Thoughts
Did you find this article helpful? Has it inspired you? What else would you like to know?
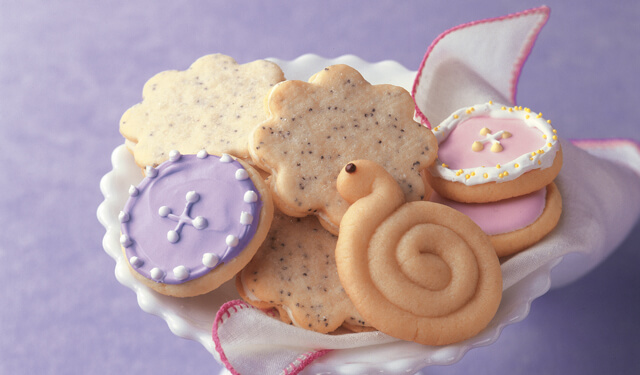
Ready to make the recipe? Let’s get started making Lemon Poppy Seed Flowers!