
Attack of the Scary Spider Zombie Cookies!
Halloween time with boys means making the scariest, grossest, "I dare you to eat that" type of foods around. My job as a mom is to make sure they are quick and easy to make! What’s big right now in my house? Zombies, aliens, ninjas, transformers and (thankfully) Bob the Builder. When it’s time to make cookies to take to our school Halloween party, these scary spiders are sure to be a huge hit in the classroom!
SEE THE RECIPE
 by
Alexandra
 by
Alexandra

Ok, so maybe they weren’t zombies yet, but that’s the story we’re sticking to over at this house.
Halloween time with boys means making the scariest, grossest, "I dare you to eat that" type of foods around. My job as a mom is to make sure they are quick and easy to make! What’s big right now in my house? Zombies, aliens, ninjas, transformers and (thankfully) Bob the Builder. When it’s time to make cookies to take to our school Halloween party, these Scary Spider Cookies are sure to be a huge hit in the classroom! Take these to any Halloween event and you’ll be the superhero with "go go gadget" cookie -making arms.
Take a look at how we "zombified" my kitchen into Halloween Central to be the best bakery in town with our scary spider cookies!
The prep work is pretty easy. Pre-heat your oven to 375°F. When I was gathering ingredients together, I left out my stick of butter on the countertop so that it would soften up a bit. Then I got out the black licorice laces to pre-cut them into 1 - 1 1/2 inch lengths. Cutting the licorice laces seemed to be the part that took the longest out of this entire recipe! Cut 4 pieces for each ‘spider’, so for a cookie sheet of a dozen cookies - get prepared for 48 pieces of licorice cut and ready!

A cookie making time batman? We’re off to the bat cave...I mean kitchen.
Take 1 cup of sugar and place into a large bowl.

Then add the egg, 1 tablespoon vanilla and ¾ cup softened butter.

Mix on medium speed until the dough is well mixed.

Next add in 2 1/4 cups flour - your cookie mix is starting to transform! Let’s be honest, at this point- so was my kitchen. Who am I to ask a superhero to remove his mask and reveal his true identity while making cookies? Had to wear the mask. X-ray vision was not one of his super powers. You should see the flour and sugar on the floor. Sadly, the "super cleaning force" is not strong with these young ones either. Mom to the rescue. But I do have willing helpers - so for that I am thankful!

By the power of Grayskull, I command thee to put in 1 teaspoon of baking soda and 1 teaspoon of salt!

Mix well again until the cookie dough is ready!

Sprinkle the black decorator sugar on a small dish or plate. It worked best to use a ‘fine grain’ decorating sugar so that it coated the cookie dough easily when the dough was rolled in the sugar.

We rolled the dough into balls immediately after mixing. However, if you have time to chill the dough for a bit, I am sure that would work too. When cookies are at stake at my house, the luxury of time is not usually on my side. Roll the dough into 1 inch balls and roll it in the sugar until fully coated.

Place the cookie balls onto an ungreased cookie sheet.

Bake cookies for 8 to 10 minutes.
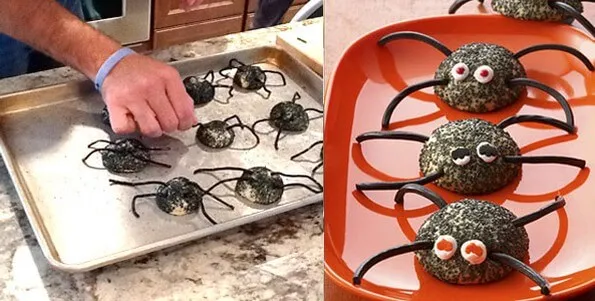
Remove the cookies from oven and immediately insert 4 pieces of black licorice into each cookie to form legs. This part should be done by an adult or responsible young chef.

The licorice pieces need to be inserted into the sides of the cookies very quickly before the cookies cool too much.

Move the cookies to cooling rack to cool completely. I have to admit, I was initially frustrated that my licorice legs weren’t straight or cute looking, but in the end the crazy pieces made the best spiders.

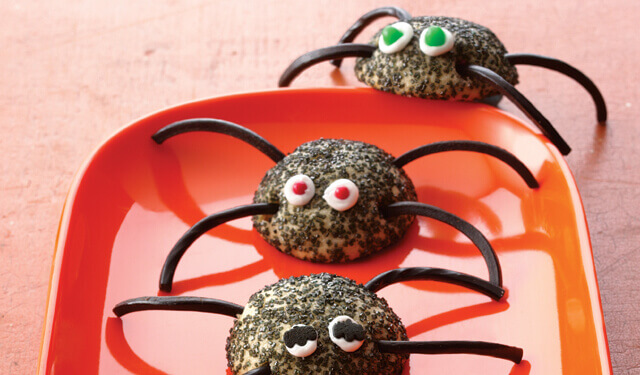
The candied decorator eyes found in most grocery stores this time of year (or the cake making section of a craft store) were so much fun to put on the cookies. To add eyes, place a tiny dot of frosting or decorator gel onto the back of the eye and gently press onto the cookie. Using parchment or wax paper on the counter while you are working with the cookies is a good idea to help keep the excess black sugar from coating your kitchen countertops. Don’t freak out when you have to spray down your countertops and you see the black food coloring from the sprinkles - remember it’s Halloween time!

These are so much fun and the kids will love eating them. Just a word to the wise, the black sugar can get a bit messy when you go to eat the cookies! Perfect for my neighbor who was going to a costume party and needed ‘goth’ style lipstick! These will be the hit of our class party as they are fun treats on the Halloween table! Ok, they are pretty creepy looking - but in a cute way...Right?
Enjoy making these Scary Spider Cookies with your little goblins. Happy Halloween!

Come back in a few days when Tami will share a Halloween snack recipe.
Alex is paid to write for the Land O’Lakes Recipe Buzz® Blog.
Share Your Thoughts
Did you find this article helpful? Has it inspired you? What else would you like to know?


