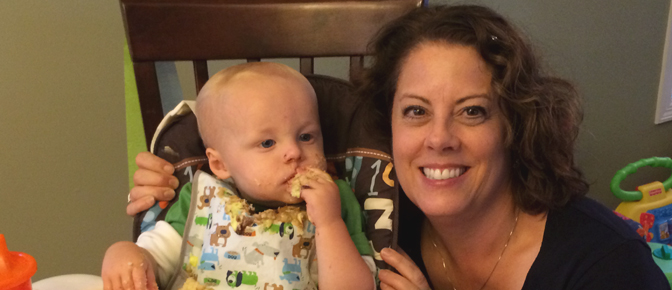
Being a grandma is my favorite role. Nothing makes me happier than a big wet kiss from my little man, Clark. It’s hard to believe he actually turned 1 year old in October. Ryan and Amanda planned a family party to celebrate this very special day. And I offered to make Clark’s very first birthday cake.
Beginning with my boys’ first birthdays (until they stopped requesting cake and changed over to birthday pies) I have created fun and interesting birthday cakes, usually reflective of their chosen party theme. I’ve made a tractor cake, clown cake, outer space cake, and many more over the years. I just couldn’t let this tradition die. I asked Amanda what the theme of the party would be so I could create a special cake for Clark.
Amanda decided on a monkey theme because they fondly call Clark their “silly little monkey.” She purchased paper plates and napkins with a monkey face, and asked if I could come up with a cake that would complement the paper goods. I decided to use the monkey on the paper plate as my template. I had a ton of fun creating this special birthday cake, and have provided easy directions so you can do the same. Any simple drawing or picture can become your template; the sky is the limit for themes. The only “special equipment” you will need are a couple of pastry bags and decorator tips – a star tip and a round tip. If you have two star tips, the cake decorating will go even faster.
I love cakes made from scratch, so my first step was to make - a banana cake to go with the monkey theme. Of course, you can make any cake recipe you’d like.
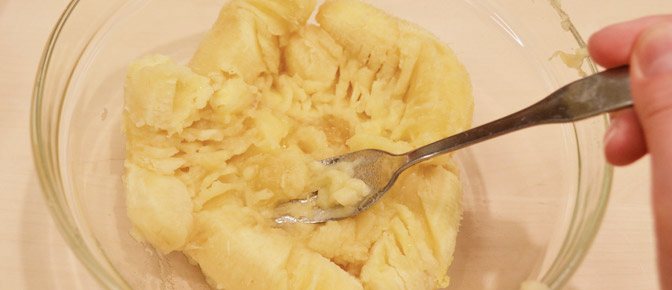
To make Banana Monkey Cake begin by heating the oven to 350°F. First I mashed the ripe bananas with a fork. A potato masher works well for this, too. Just make sure there are no large pieces of banana left. The key is to use very ripe bananas, so purchase them a week or so ahead.
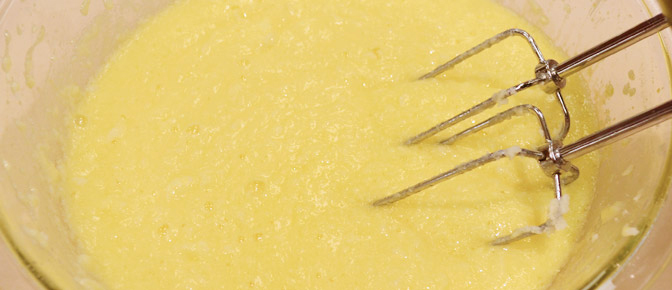
Now the mixing begins. Beat the sugar and butter together in a large bowl until creamy. Add the eggs and continue beating until well-mixed. Then add the bananas and beat again to mix well. Add all the remaining cake ingredients – the flour, baking soda, baking, baking powder, salt and cinnamon. Continue beating, scraping the bowl often, just until mixed. Your batter should look like this.
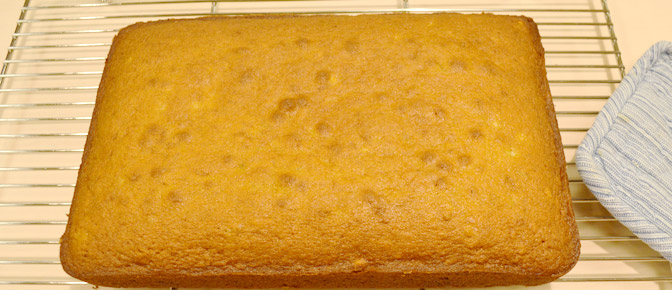
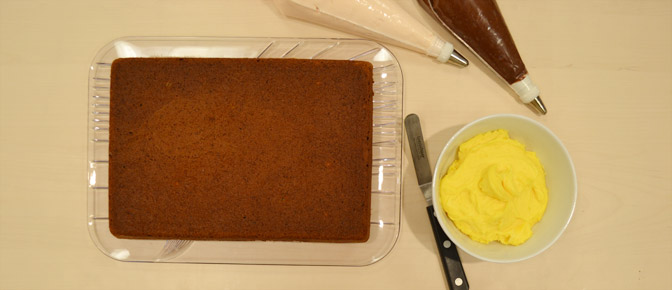
Pour the batter into a well-greased and floured 13x9-inch pan. Make sure the pan is well-greased because you will be removing the entire cake from the pan. Bake for 30 to 35 minutes or until a toothpick inserted in the center comes out clean. Cool 10 minutes and remove the cake from the pan to a wire rack. Cool completely.
Once the cake has cooled, it’s time to make the frosting. Just follow the directions to mix it up. The key is to divide the frosting. Add cocoa to 1 1/2 cups white frosting to create a brown/chocolate frosting for the monkey’s fur. Then add one drop red food color and one drop yellow food color to 1 1/2 cups white frosting to create the peach color for the monkey’s face. Add yellow food color to the remaining white frosting for the background of the cake. Place the brown and peach-tinted frostings in decorator bags with star tips. If you only have one star tip, use it with the peach frosting first. Place the cooled cake, bottom side up, on a serving platter. Now you are ready to create your monkey cake.
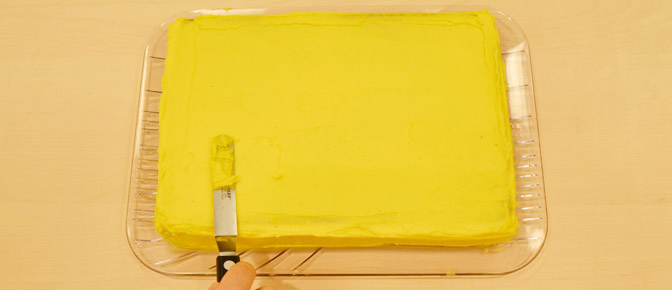
First frost the entire cake with the yellow frosting. Frost the sides and top as smoothly as possible. Remember, I had you place the cake bottom side up on the serving platter so you are actually frosting the bottom of the cake. I do this because the bottom of the cake is usually more flat and smooth. This is a great tip to keep in mind.
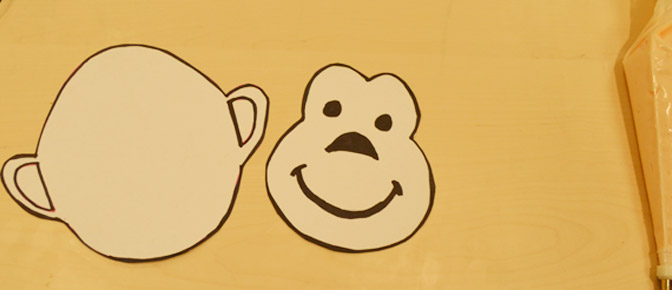
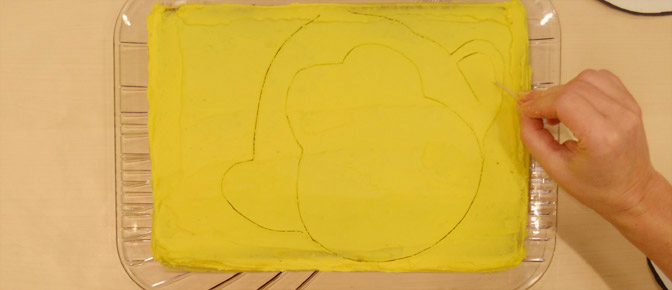
Included with the recipe are monkey face templates. Print and cut out the templates. They should look like this:
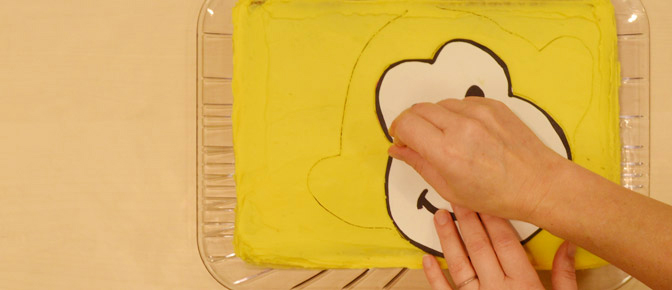
Place Template #1 onto the cake top and carefully trace around the template with a toothpick. Remove the template. Position Template #2 on top of the traced monkey head to create the monkey’s face. Again, carefully trace the design with a toothpick. Remove the template.
With a toothpick you can trace the ears using the template as a guide. Your cake should look something like this now.
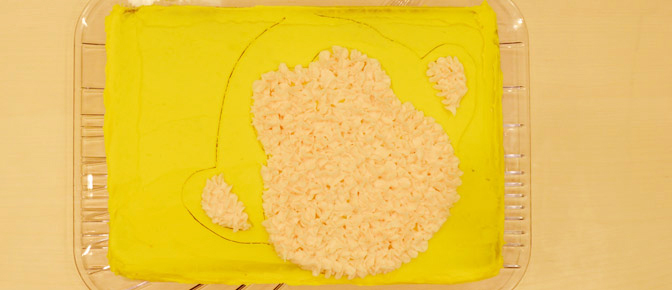
Using the peach frosting, pipe frosting stars to fill in the face and inside the ears.
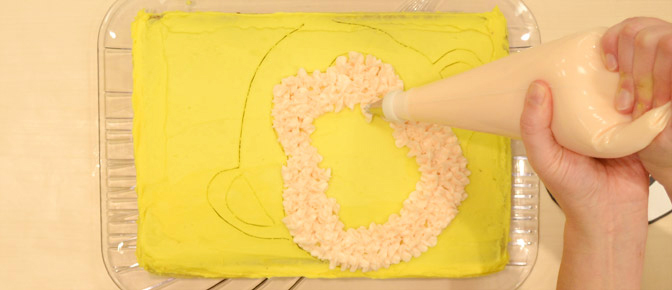
Your cake should look something like this:
Now pipe chocolate frosting stars to create the monkey’s fur on his head and ears. The monkey is starting to appear!
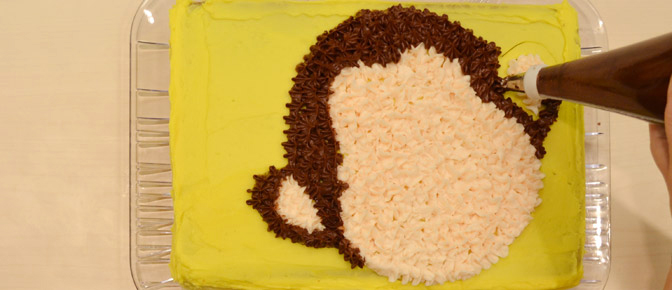
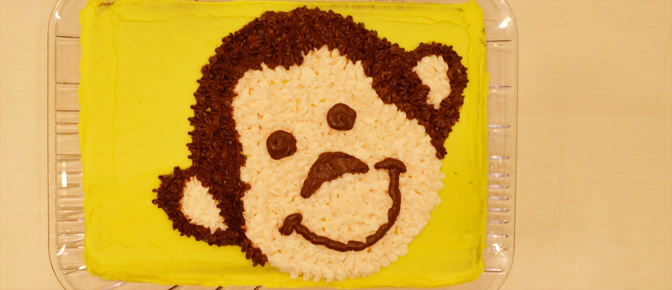
Use toothpicks to mark where to put the nose, eyes and mouth. Remove the chocolate frosting’s star tip and replace with a round tip. Pipe the chocolate frosting to create and fill in the nose, eyes and mouth. Isn’t he adorable?
The final touch is to pipe a message on the cake. I chose to say “Clark’s 1st.”
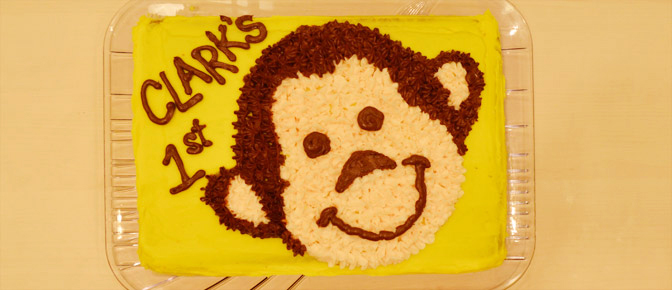
As you can see, this was really quite simple to make and was actually a lot of fun. Any simple drawing or picture can be used to create a special cake. My “silly little monkey” sure liked his cake! He was eating it by the fistfuls. Happy 1st Birthday, Clark!