The Royal Icing Technique You Need To Know This Holiday Season
If you’ve ever spent hours sitting hunched over a table, hands cramped from squeezing a piping bag, with a pile of paper towels and toothpicks that are now permanently stuck together, you’ll understand what I mean when I say that royal icing is not my best friend.
SEE THE RECIPE
 by
Rebecca
by
Rebecca
by
Rebecca
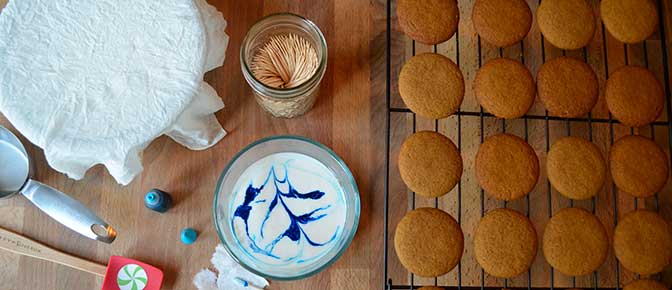
I will be one of the first people to grumble about what a time-consuming, royal mess it can be. But underneath it all, I really, really love to decorate cookies with royal icing. With four ingredients – water, powdered sugar, meringue powder, and cream of tartar – it only takes a few minutes to make and is the ideal icing to use when gifting edible delights. After it dries, it will be hard to the touch, so the cookie will stay beautiful for days to come. It doesn't need to be refrigerated, so the cookies can be transported (or even shipped) with little worry. But it is still a sticky, messy, time-consuming undertaking that zaps all of the patience out of you. That is, until now.
We have developed a royal icing technique that is quick and easy to do, yet yields stunning results. Because of this, I am happy to say that royal icing is now officially my cookie decorating friend of the year!
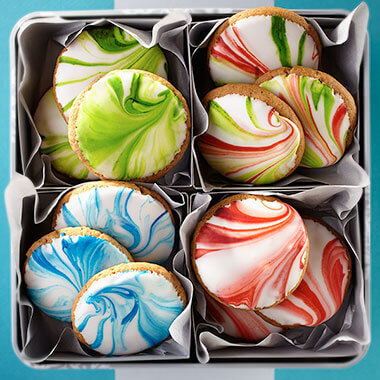
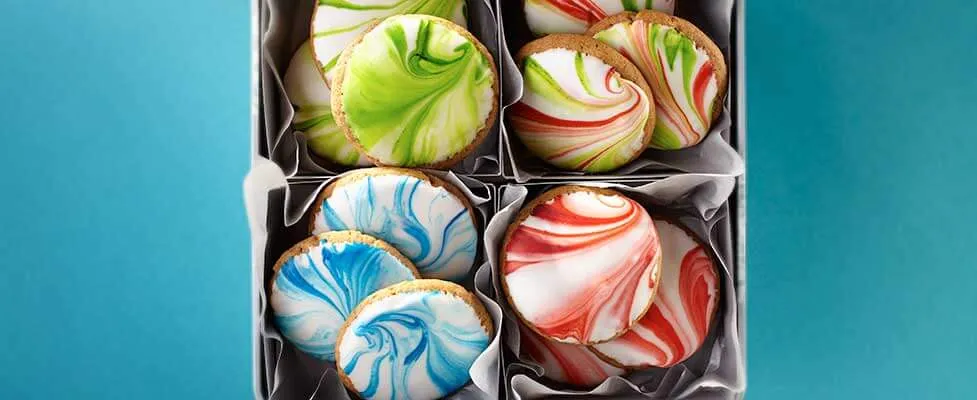
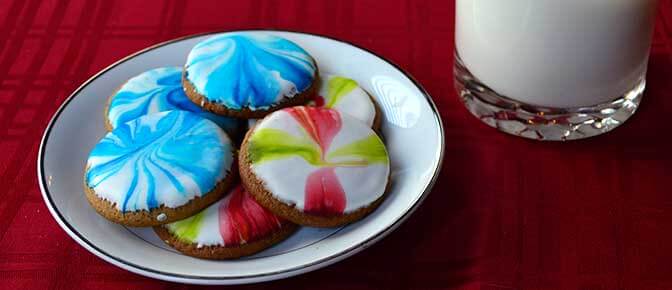
This technique is featured in our new recipe: Ginger Spice Cookies with Royal Icing.
The cookies are decorated by dipping the tops into royal icing that has been swirled with food color. This allows you to decorate your cookies in less than an hour, as opposed to traditional methods which can take all day!
The cookies themselves are delightful, with a gingery kick only achievable by using three different types of ginger – fresh, ground, and crystallized.
If you have always seen decorating cookies with royal icing as a time and labor-intensive task, or if you’ve been too intimidated to attempt it at all, read on and give this recipe a try. You’ll see just how fun and easy this project can be!
To get started, combine flour, baking soda, ground ginger, cinnamon, baking powder, salt and allspice in a bowl. Stir together until well-mixed and set it aside.
In another bowl, beat together the sugars and butter on medium speed until creamy. Add the molasses, egg and ginger root, and beat until well-mixed. Scrape down the sides of the bowl with a rubber spatula and add the flour mixture. Beat on low speed until well-mixed. Stir in the crystallized ginger. Cover the dough and refrigerate until it is firm – about an hour.
Turn on the oven and preheat it to 350ºF.
When the dough is ready, shape it into ¾-inch balls and place 2 inches apart on ungreased cookie sheets. Press the balls with a glass to flatten slightly.
Bake 9-11 minutes or until puffed and centers just begin to set. Cool 1 minute on cookie sheet and then remove to cooling rack. Be sure to let your cookies cool completely.
Now for the fun part – the marbled royal icing!
Combine all the icing ingredients in a bowl. Beat at low speed until moistened and then beat at medium speed 1-3 minutes or until slightly thickened and glossy.
For this recipe, I like the royal icing to have a consistency similar to honey. If it’s too thick, add an additional tablespoon of water.
Spoon a ½ cup of icing into a shallow bowl. Place 2 to 3 drops of food color on the surface of the icing. Swirl gently with a knife or toothpick to create a marbled effect.
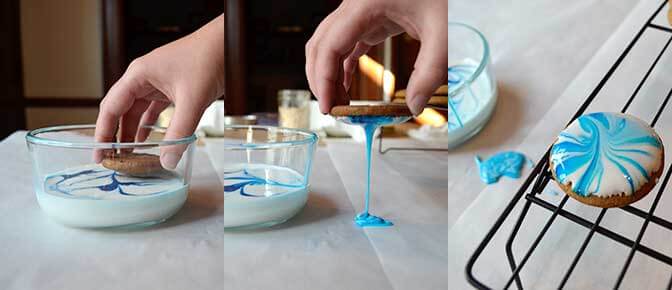
Prepare your table for cookie dipping madness by laying down waxed paper.
Grab a cookie by the sides and gently dip the top of the cookie into the marbled royal icing. Let the excess icing drip onto the prepared waxed paper. Quickly turn the cookie upright and place onto a cooling rack.
Letting the icing drip onto waxed paper instead of back into the bowl might seem like a messy and unnecessary step. However, this is key to making perfectly marbled cookies every time.
Mixing two or more colors together can make for even more fun and festive cookies. However, you’ll have to be careful because some colors turn brown when mixed together – like red and green.
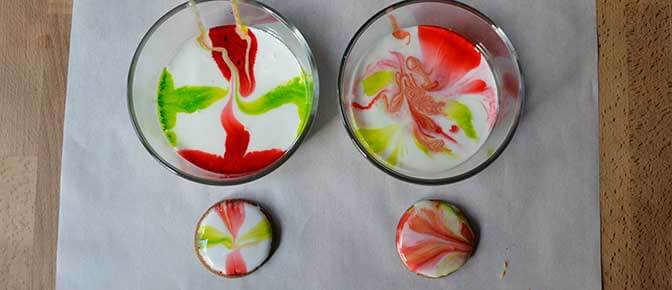
Over time, the icing will lose the desired marbled effect due to over-mixing, especially when using multiple colors. To ensure your cookies are a success, refresh the bowl of icing as often as necessary. Discard the used icing and make a new bowl with a ½ cup of white icing and 2 to 3 drops of food color.
I truly love these cookies, and I hope you will give them a try this holiday season. And while you’re at it, snap a picture of your cookies, and share with us on Instagram using the #landolakesktchn hashtag!
Share Your Thoughts
Did you find this article helpful? Has it inspired you? What else would you like to know?
Ready to make the recipe? Let’s get started making Ginger Spice Cookies with Royal Icing!