
Five common pie crust fails … and what to do about them
Pie crust can be a tricky thing to master but the results are worth any trial and error. Here are five common pie crust problems and how to avoid them.
 by
Land O'Lakes Test Kitchen
by
Land O'Lakes Test Kitchen
by
Land O'Lakes Test Kitchen
Get ready to roll up your sleeves: The only sure way to get really good at baking pie crusts is to make a lot of pies (we don’t think your friends and family are going to mind 😉).
- The pie dough is too dry!
- My pie crust tore when transferring into pie plate!
- My pie crust shrinks when I bake it!
- My pie crust is tough, not flaky!
- The edges of my pie crust are burning but the pie’s not done!
If you haven’t yet mastered the art of making pie crust, you are not alone. We often get questions and comments from people who love to bake but are anxious about making their own pie crust. It is typically made from only four ingredients (one of them water!), so why all the fuss? Making pie crust is a combination of art and science; it’s just as much about the technique of putting the ingredients together as it is about the ingredients. Once you get a feel for how it comes together, it’s simple and gratifying.
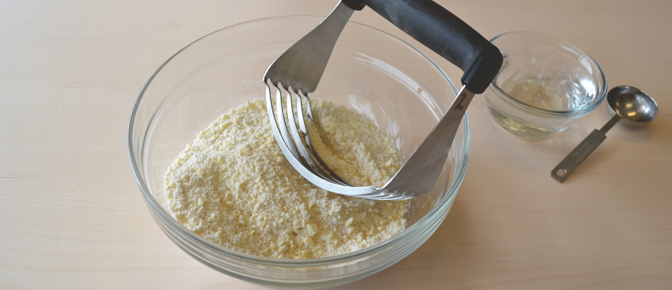
The pie dough is too dry!
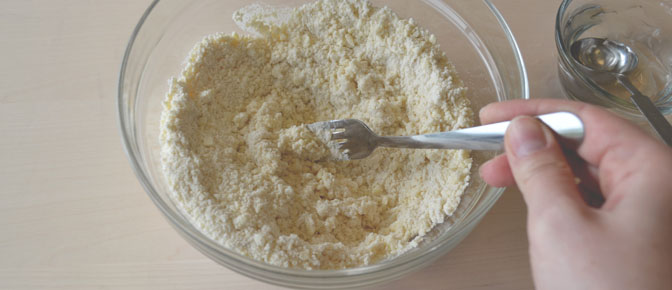
After you cut the butter into the crust, the directions usually say something like: Stir in cold water, tossing with fork just until flour is moistened. Two very important points– “cold water" and “just until flour is moistened." Using cold water keeps the butter cold, and the butter should stay firm so it doesn’t soften and blend with the flour. Wondering why can’t you use a spoon? The trick here is to hydrate the flour with just enough water to get the dough to stick together. Tossing with a fork is a gentle way to incorporate the water without mashing it all together. You should be able to still see some butter chunks. Each time you add water, use your fingers to squeeze a small chunk together. If it doesn’t hold together, add a bit more water. 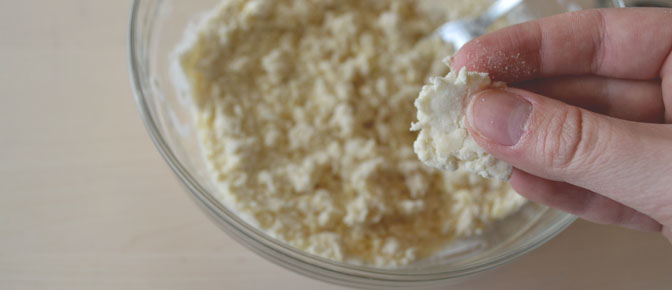
My pie crust tore when transferring into pie plate!
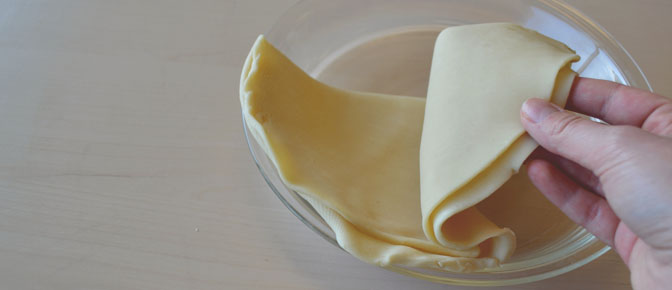
There are a few different techniques for transferring the pie crust to the pie pan without having it tear or stick together. Again, keeping the dough cold is important. If the butter softens, the dough will be sticky and difficult to manage. Before you begin the transfer, dust a little flour lightly on the top of the crust. One method is to fold the crust into quarters and gently transfer to the pie pan, placing the folded corner in the center of the pie pan then gently unfolding. Another option is to roll the crust around a lightly floured rolling pin, then unroll into the pie plate.
My pie crust shrinks when I bake it!
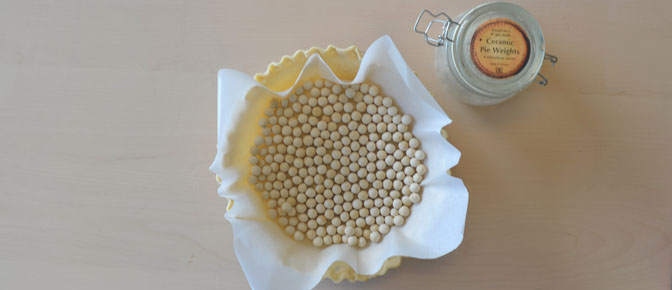
There are a couple things to do to help this common pie crust problem. When crimping the crust, use the rim of the pie plate. This helps the edges stay in place. It’s also important to keep the dough cold (have we mentioned that yet?!). Just before baking, refrigerate the pie for 30 minutes to make sure the crust is cold. If you are baking the crust without filling (this is referred to as blind baking) a few tips can help. Prick the crust all over with a fork. Cover your crust with parchment paper, then fill with pie weights or dried beans. Be sure to fill the lined pie crust to the rim of the pie plate so the sides don’t slump.
The edges of my pie crust are burning but the pie’s not done!
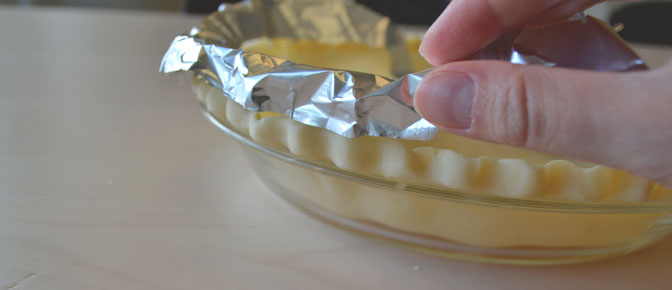
To fully bake a fruit pie, it usually takes around 50 minutes at a relatively high temperature. That’s a long time for a crust edge to be in the oven, especially when nicely fluted and standing on the edge of the pan. Before baking, cover the edge of the crust with strips of aluminum foil. This deflects heat from the edge, but still allows the top crust to get nicely golden brown. Be sure to remove the foil with about 15 minutes left so the edge can brown.
My pie crust is tough, not flaky!
Tough and flaky are two different things. Tough refers to the texture of the crust; flaky refers to the air pockets that form flaky layers in the crust. In both cases, the secret is to avoid overworking the dough. Background that might help: Gluten is a protein structure in wheat flour responsible for the elastic nature of bread dough–it’s why the dough springs back when you pull it. (You knead bread dough to develop and stretch the gluten.) With pie crust, you don’t want gluten to form so you don’t want to overwork the dough. For a flaky crust, cut the butter into chunks about the size of walnut halves. These cold butter chunks butter create the layers in the dough. When the butter melts in the oven, it will make steam pockets. Your crust will have a wonderfully flaky texture!
Armed with these tips, you’re well on your way to baking a showstopper pie. For even more pie crust tips (we have plenty of them!) check out 10 Secrets for Making Great Pie Crust.
Are you ready head into the kitchen and start baking? Here are some of our most popular pie recipes as a jumping off point!
Popular Pie Recipes
Share Your Thoughts
Did you find this article helpful? Has it inspired you? What else would you like to know?